How to Keep Your Fade Clean and Sharp Between Cuts: The Complete At-Home Maintenance Guide
Haircuts & Styles10 min read
You walked out of the barbershop in Ramat Gan and your fade looked like a million bucks. The lines are crisp, the fade is flawless, and you feel on top of the world. But after a week, the magic starts to fade. The neckline begins to fill in with little stray hairs, the sideburns lose their shape, and the overall look is less polished. If you want to know how to keep a fade sharp and stretch out the time between appointments, you've come to the right place. This guide is a practical toolkit — no fluff — built for the modern man whose time is valuable but whose appearance matters to him just as much.
Why Does Your Fade Look Perfect for a Week and Then Start to 'Disappear'?
The answer is simple and biological: hair doesn't grow at a uniform rate. The hair on the nape and around the temples tends to grow faster and thicker than the hair on top of the head. That's why the base of your fade haircut — the lowest, most closely shaved part — is the first to show signs of growth. That growth, even if it's only a few millimeters, blurs the sharp contrast that makes a fade so striking in the first place. It causes the fade to "creep up" and look less clean. The good news is that you don't have to put up with it. With smart, precise at-home maintenance — just 10 minutes once a week — you can fight that growth, redefine the crisp lines, and keep a look that says you walked out of the barber chair only yesterday. Our goal isn't to replace your barber, but to extend the life of his work.
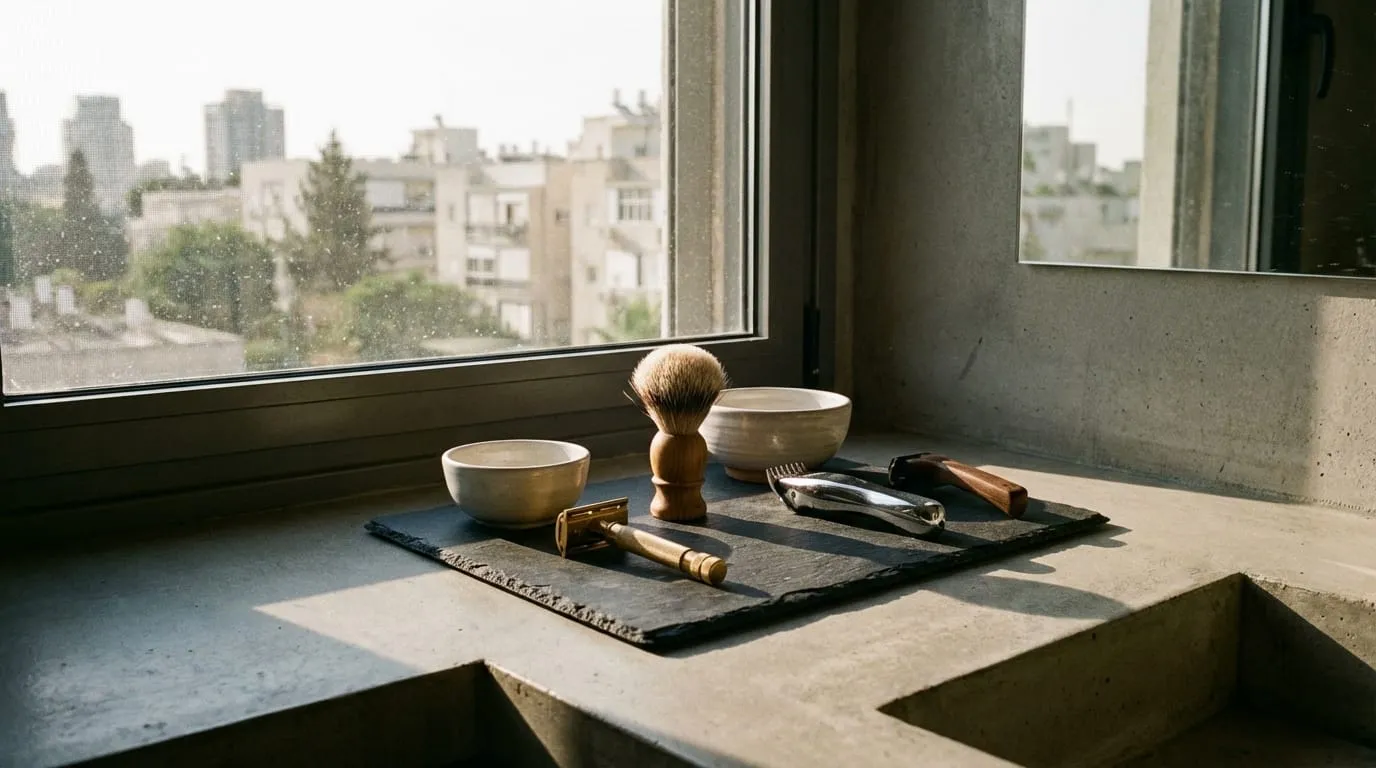
The Essential Toolkit: What You Really Need to Maintain Your Fade at Home
Don't worry — you don't need to turn your bathroom into a branch of the barbershop. All you need is a one-time investment in a few quality tools that will serve you for a long time and save you money and the hassle of more frequent appointments. Think of it as professional-grade personal grooming gear, exactly the way you'd invest in a good watch or a quality pair of shoes. Here's the exact list:
- Trimmer with a T-blade: This is, without a doubt, the single most important tool in your arsenal. Unlike a regular hair clipper, the trimmer is built for precision work. The T-blade (which looks like the letter T) is wider and thinner, allowing you to create especially straight, sharp lines at the neckline and around the ears. It gets closer to the skin and delivers a clean cut that regular clippers can't achieve. Look for professional clippers and trimmers from well-known brands to ensure reliability and performance.
- Shaver or straight razor: This is the step for the advanced user who wants the highest level of finish. After you've cleaned up the neckline with the trimmer, a shaver (foil-type) will take off the tiny stubble left below the line and create a completely smooth, almost "polished" look. This is what creates the dramatic contrast between bare skin and the start of the fade. If you're skilled, a classic straight razor will do the job too, but it requires far more care.
- A second mirror (or a three-way mirror): This is not something you can compromise on. Trying to work on your nape "blind" is a recipe for disaster. You have to be able to clearly see what you're doing. Hold a small handheld mirror up against the large bathroom mirror to get a full view of your nape. The better option is a three-way mirror you can hang on the door, which provides a perfect panoramic view.
- Neck duster: A simple but essential tool. After every cut, your neck will be covered in tiny, itchy hair clippings. A dedicated neck duster, with soft but firm bristles, will sweep the area clean efficiently and leave a professional, clean feeling — no unnecessary itching.
- Blade oil: The most critical point for maintaining your equipment. Two drops of oil on the trimmer blade after every use (while it's running) will keep the blade sharp, reduce friction and heat, and prevent the motor from straining. A well-oiled blade cuts cleaner, won't pull the hair, and prevents skin irritation. It's a one-minute habit that adds years to the life of your device.

Your Weekly 10-Minute Technique for Keeping a Sharp Fade
Once you're equipped with the right tools, it's time to get to work. This process shouldn't take you more than 10 minutes, once a week. Do it when your hair is completely dry, and always in front of a double mirror. Follow the steps below precisely, and you'll see how your fade stays sharp over time.
Step 1: Defining the Border – Cleaning Up the Neckline
This is the most important step, and here's the golden rule: never go up and touch the fade itself. Your goal is solely to clean up the new hair growth that has appeared below the original bottom line your barber created. Take the trimmer and hold it like a pencil. Using short, gentle downward strokes, start cleaning up the little hairs at the nape. Imagine you're simply sharpening a line that already exists. Don't try to create a new line or "fix" the fade. You're only removing the visual noise created by the new growth. Work slowly and carefully until the bottom border of the haircut is clean and redefined.
Step 2: Order and Cleanliness – Tidying the Sideburns and the Area Around the Ears
The small details are what make the difference between a groomed look and a neglected one. After you're done with the nape, move on to the sideburns. Use the corner of the trimmer blade to redefine your sideburn line. Most men prefer a straight line, but follow the shape your barber created. Then use the same technique to gently clean up the small, fuzzy hairs that grow around and above the ears. Gently pull the ear downward to expose the whole area. This step alone gives an immediate feeling of freshness and order, as if you just walked out of a haircut.
Step 3 (Optional): The Perfect Finish – Bottom Shave
If you want to take your maintenance to the next level and get that professional look with sharp contrast, this is the step for you. After cleaning up the neckline with the trimmer (Step 1), grab your shaver. Turn it on and hold it against the skin below the line you created. Using light upward strokes, shave the small stubble until you reach exactly the line. Don't cross the line! The goal is to create a completely smooth patch of skin that meets the start of the cropped hair. This is what creates the perfect "faded" effect and highlights your barber's fade work.
Pro tip: Before using the trimmer, spray a little water on the nape area and comb the hair downward. The water will press the hairs against the skin and help you clearly see your natural growth line. This ensures a more precise, cleaner cut, especially if your hair tends to be unruly. Lightly dry the area with a towel before you start working with the trimmer.
Common Mistakes That Ruin a Fade: What to Avoid at All Costs
The confidence you gain from knowing how to maintain your fade can quickly turn into overconfidence. To make sure your at-home maintenance always succeeds, it's important to know the most common pitfalls and actively avoid them. One mistake can turn easy maintenance into an emergency visit to the barber.
- Trying to 'fix' the fade: This is mistake number one, and the most fatal. You are not your barber. Your goal is maintenance, not a haircut. The moment you start running the clipper up into the fade itself, trying to "blend" or "tidy," you'll almost certainly create a 'hole' or a 'step' that can't be hidden. Only a professional can fix that, and it usually requires cutting the entire haircut significantly shorter.
- Working too fast: Especially the first few times, take your time. There's no prize for speed here. Slow, measured, controlled movements will ensure precision and prevent slips and mistakes. It's better to spend 12 minutes and do a perfect job than 5 minutes of rushed work that has you wearing a hat all week.
- Using unclean or unoiled tools: This isn't just a matter of hygiene, but of performance too. A blade dirty with hair clippings and old oil won't cut smoothly. It will pull and tear the hair, which can cause skin irritation, redness, and even breakouts. Make sure to clean the blade with the included brush and oil it after every use.
- Skipping the second mirror: We're repeating this because it's critical. Working on your nape without seeing what you're doing is like driving with your eyes closed. You may think you're creating a straight line, but in reality you could be creating a slanted or uneven one. Don't be lazy — use a double mirror every time. That's the surefire formula for success.
Questions & Answers
How often do I need to do this maintenance?
For most people, doing the maintenance once a week is ideal for keeping a clean, sharp look. It's the perfect balance between preserving the result and the time you invest. If your hair grows especially fast, you may need to do it twice a week, for example every 3–4 days. The key is to catch the growth while it's still short and minimal, and not let it take over and ruin the overall shape of the haircut.
Can I ruin my barber's haircut?
Honestly? Yes, but only if you don't follow the golden rule we've repeated: work only on the very lowest edges of the hairline. As long as you're just cleaning up the new growth at the nape and around the ears, and redefining the sideburns, you're in the safe zone. The danger starts when you try to "fade" or "blend" the fade itself. This guide is meant to complement the excellent work of your barber, not replace it. You're extending its life, not recreating it.
Is there a difference between a trimmer and a regular hair clipper?
Absolutely, and the difference is fundamental. A clipper is the "workhorse." It's built to take off large amounts of hair quickly and efficiently, using larger, more powerful blades. A trimmer, on the other hand, is the "precision artist." It's equipped with smaller, thinner, sharper blades and is built for finishing work, creating sharp lines, tidying up a beard, and cleaning up delicate areas like the nape and ears. For at-home fade maintenance, a trimmer is the right tool — the most precise and the safest to use.
Conclusion: Take Control of Your Look
Keeping a fade sharp between appointments isn't rocket science. It's an acquired skill that requires the right tools, the right technique, and above all, discipline. By investing 10 minutes once a week, you can significantly extend the clean, professional look of your haircut, save money on more frequent visits to the barber, and most importantly — always feel your best. Now, take this knowledge, put it into practice, and enjoy a perfect fade all the time.
Want this on your own head?
Our team at 7 Rashi St, Ramat Gan is waiting for you — booking online takes less than a minute.